In today’s article, I will expose some more research related to uberNodes and their associated manipulators.
Pruning rig dependencies :
After taking some years to explore different node design, data-flow and rig architecture , i manage to combine most of the rig evaluation into one unit.
This rig uberNode is now capable of representing most element of a complex character motion and deformation. [this node is covered in the following article ]
The next part I wanted to improve was how to interact with it:
- No matter how compact the node was its data was relying of a set of complex elements ( local transform attributes, matrix, settings etc).
- Those element were as well part of a complex hierarchy in order to expose animatable controls which can be manipulated by users.
The answer in this case was to isolate elements relative to manipulation.
Exploring MPxManipContainer :
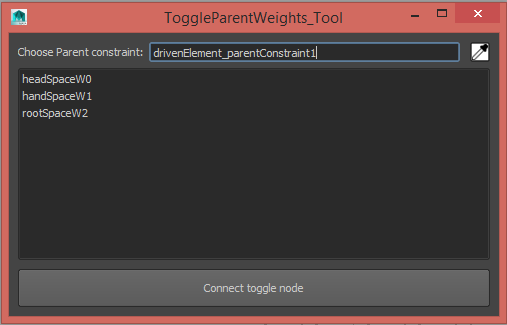
So from this point my plan was to define my own virtual hierarchy.

This hierarchy was replaced by a set of matrix array attributes.

( above : the dependency node just hold values the manipulator will edit in interactive mode)
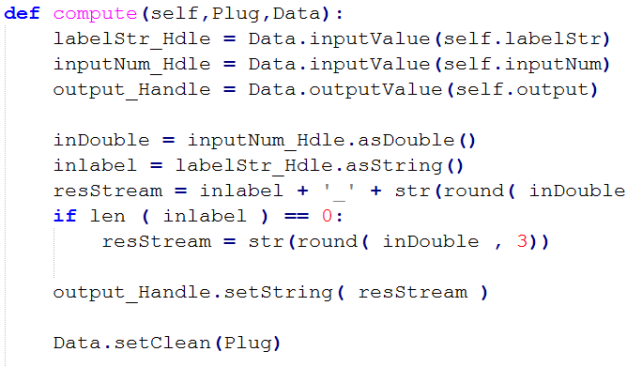
Interaction is then delegated to a custom manipulator.

( click picture to see original size)
Every matrix component have its corresponding manipulator ( most of the time using MFnRotateManip ) and each one of them is part of one ManipContainer using one golden rule:
- One node is associated to one manipulator
For debugging purposes all manipulators can be drawn on screen.
Viewport and tool exploration :
Along the years we have seen different trend in the animation industry.
- On screen display with marking menu and their contextual behaviour
- viewport widget like hudSlider and button
- Selection handle ( and their high priority selection order)
- Selection helpers with dedicated picker windows
Pixar and Dreamworks showed their inhouse software featuring proxy shape on screen in order to clean viewport cluttering from the traditional nurbsShape controllers:


For my project i wanted interaction to be done with a dedicated picker.

After some test I was able to edit motion from an alembic and Fbx container without extra dependencies. (I always wanted to add my own pre-roll on the fly and tweak poses while doing shot correctives )

(above some rigging done by Charles Looker ( Eek on cgtalk ) following the same principle)
The key point here is the hierarchy stay the same structurally ( simple FK for biped) but the manipulator can edit it freely with its own rules.
Similar exploration were done in the past with puppetshop , CAT ( integrated later in 3dsmax) ,motionbuilder’s FBCharacter constraint and tool and even with ( gasp! ) 3dsmax decade old biped.
For this project i wrote a bipedNode as an entry point. [any dependecy node can be associated with some accessory and manipulators: usually with MPxManipContainer addToManipConnectTable]
As an added bonus this node can build and draw a shape to evaluate the hierarchy pose and silhouette.
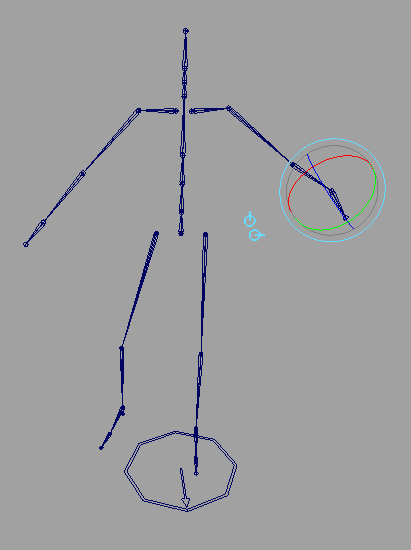
(Above: cycling through hierarchy component and rootspace can be done through regular toggleManip added to the manipContainer, it was the debugging method until the picker was functional).
As a regular maya component your manipulator will follow your animation and support undo, it will remove the needs of space-switching ,ik solver blending and any cycle which can appear when beginner tries to implement complex behaviour.
Fun features :
a – Picker Manipulator:
e
b – Ik and editing relationship:
e
c – Viewport interaction from picker:
e
d – Pose management:
e
e – Pose management